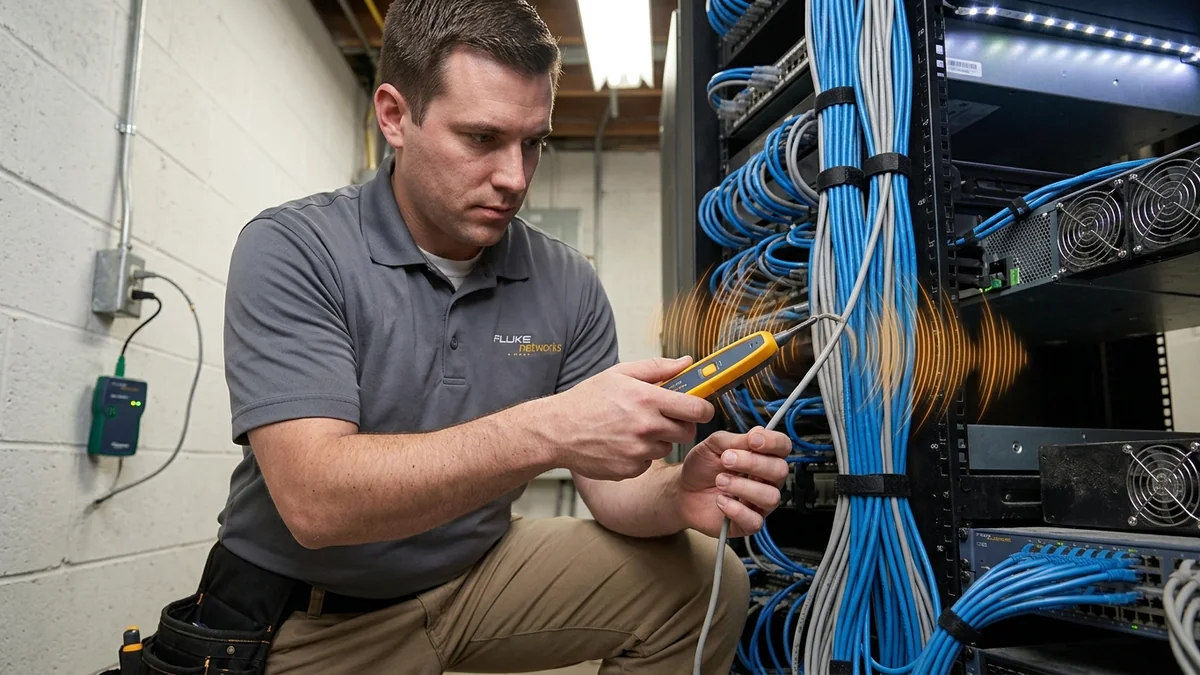
Moving into a new home with dozens of unlabeled network cables hanging out of a basement junction box is a daunting challenge. Trying to identify each cable by plugging them in one by one takes hours. Using a Tone Generator & Inductive Probe (often called a 'Fox and Hound') allows you to inject an audible radio frequency signal into a wall jack and trace it instantly to the exact cable end in your basement. Here is the step-by-step masterclass.
1. 🛠️ Step-by-Step Tone Tracing Walkthrough
- Plug the tone generator's RJ45 patch lead into the wall jack in the room you wish to identify (e.g. Master Bedroom).
- Switch the tone generator to TONE mode (selecting a dual-warble tone cadence).
- Take the inductive probe wand down to your central cable bundle.
- Press the probe's activation button and sweep the plastic probe tip across the cable bundle.
- The probe speaker will emit a loud tone when touching the specific matching cable. Label it immediately!
2. 🔬 Inductive Probe Sensitivity & Null Point Detection
As you move the inductive probe wand close to the target cable, the speaker tone increases in volume. When the probe tip is held directly perpendicular to the center of the conductor, you will notice a tiny Null Point (a momentary dip in volume flanked by two loud peaks).
This electromagnetic null point allows you to isolate a single wire out of a tightly bundled harness of 50 cables with surgical accuracy.
3. 🛠️ Troubleshooting Weak Tone Signals
- If the tone is faint, check the toner battery (weak 9V batteries reduce RF output power).
- Ensure the cable is not grounded at both ends (grounding shunts the tone signal to earth).
- Use digital tone mode if working near noisy fluorescent lighting ballasts.
4. 🔬 Common-Mode vs Differential Signal Injection
When tracing network cables, understanding tone injection methods ensures loud, clear signals:
- Modular RJ45 Plug Injection: Injects tone across the center conductors (Pins 4 and 5). Fast and convenient for tracing cables connected to wall faceplates.
- Alligator Clip Conductive Injection: Connects the red clip to an active copper conductor and the black clip to earth ground. Creates a massive electromagnetic broadcast field that can be picked up through thick plaster and cinderblock walls.
5. 📝 Complete Cable Tracing Best Practices
- Always tone from the remote room wall jack back to the central junction panel.
- Use digital tone mode if working near high-density server racks or AC electrical conduit.
- Label identified cables immediately with durable vinyl wire tags to prevent re-tracing.
6. 🔬 Tracing Coaxial & Telephone Cables with Toner Probes
Toner generators are not limited to Ethernet; the included alligator clip leads allow you to connect directly to the center conductor of RG6 coaxial TV cables or RJ11 telephone wiring, allowing you to trace and map all low-voltage wiring throughout your home with a single tool.
7. 💡 Final Summary of Tone Tracing Best Practices
Tone tracing turns hours of frustrating wire hunting into a 5-minute task. Connect the toner in the target room, sweep the probe wand across the central bundle, and label your cables permanently for lifetime organization.
8. 🔬 Tone Signal Attenuation Over Long Cable Runs
Over extreme cable distances exceeding 500 feet, natural copper loop resistance attenuates audio tone signals. Setting the tone generator to high-power warble mode and pairing it with a high-gain inductive wand ensures loud, crystal-clear audio tracking across long residential and commercial wiring runs.
9. 💡 Summary of Wire Identification Best Practices
Tone tracing turns hours of frustrating wire hunting into a 5-minute task. Connect the toner in the target room, sweep the probe wand across the central bundle, and label your cables permanently for lifetime organization.
10. 🔬 Tracing Hidden Cables Behind Plaster & Drywall
When sweeping an inductive probe across drywall surfaces, holding the probe tip flat against the wall allows the internal inductive coil to detect electromagnetic flux lines emanating from buried Cat6 cables up to 6 inches behind drywall.
11. 💡 Complete Summary for Wire Tracing
Tone tracing turns hours of frustrating wire hunting into a 5-minute task. Connect the toner in the target room, sweep the probe wand across the central bundle, and label your cables permanently for lifetime organization.
12. 🔬 Safety Rules for Toning Near Active AC Power Lines
When toning network cables inside utility closets sharing space with 120V/240V electrical panels, always use non-conductive plastic probe tips and keep the toner transmitter isolated from active high-voltage lines.
13. 💡 Complete Cable Tracing Summary
Tone tracing turns hours of frustrating wire hunting into a 5-minute task. Connect the toner in the target room, sweep the probe wand across the central bundle, and label your cables permanently for lifetime organization.
14. 🔬 Replacing Probe Tips & Maintaining Tracing Sensitivity
Inductive toner probes feature replaceable non-conductive plastic tips that prevent accidental electrical shorts when probing dense patch panels, ensuring sensitive, hum-free audio tracing on every job.
15. 💡 Complete Summary for Cable Tracing
Tone tracing turns hours of frustrating wire hunting into a 5-minute task. Connect the toner in the target room, sweep the probe wand across the central bundle, and label your cables permanently for lifetime organization.
16. 💡 Cable Labeling Golden Rules
Always apply clear, self-laminating vinyl wire labels at both ends of each identified cable immediately after tracing, creating an organized, easily serviceable network closet that saves hours during future upgrades.