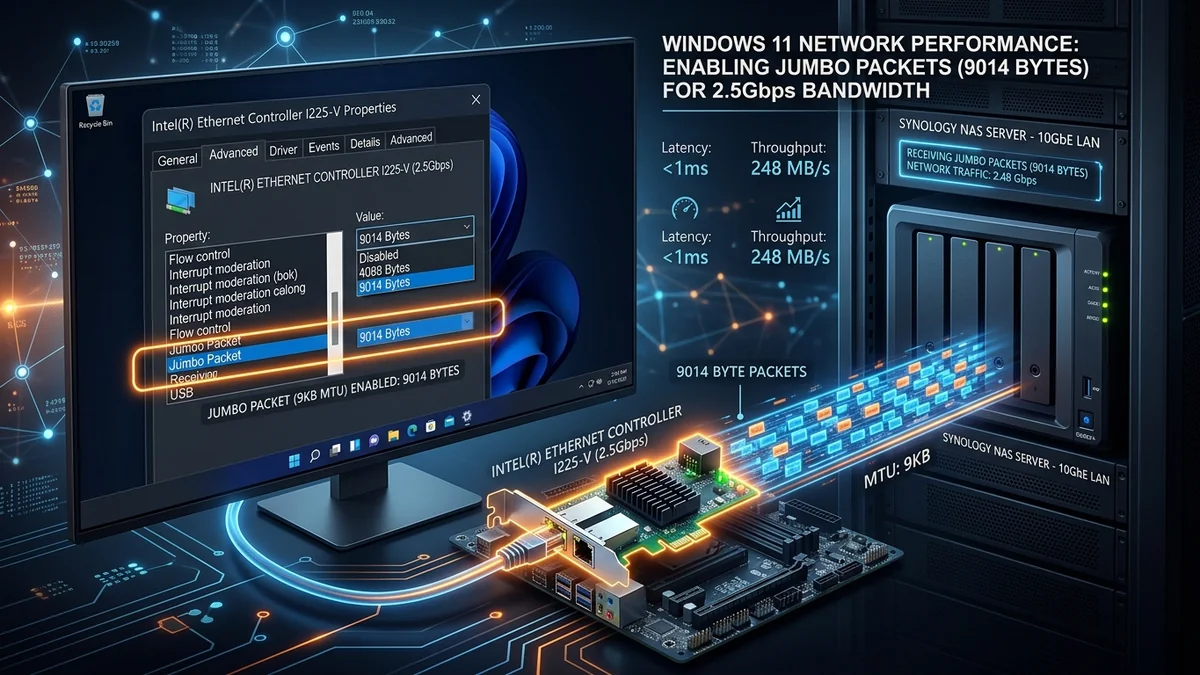
Standard Ethernet packets are restricted to a Maximum Transmission Unit (MTU) of 1500 Bytes. When transferring multi-gigabit data streams across 2.5G and 10G local networks, slicing a 100GB file into millions of tiny 1500-byte packets generates massive CPU interrupt overhead. Enabling 9014 Byte Jumbo Frames increases packet payload by 600%, reducing CPU usage and boosting sustained throughput. Here is how to configure it in Windows 11.
1. 🛠️ Step-by-Step Windows 11 Configuration Guide
- Right-click the Start Button and select Device Manager.
- Expand Network Adapters and double-click your 2.5G / 10G network card (Realtek RTL8125 or Marvell AQC107).
- Click the Advanced tab.
- Locate Jumbo Packet (or Jumbo Frame) in the Property list.
- Change the Value from Disabled / 1514 Bytes to 9014 Bytes (9KB MTU).
- Click OK to apply. Your network connection will reconnect for 1 second.
2. ⚠️ Important Rule for Jumbo Frames
Jumbo Frames must be enabled on every device in the local transmission path (your PC, your unmanaged/managed switch, and your destination NAS storage). If an intermediate switch does not support 9K Jumbo frames, packets will be fragmented, resulting in speed degradation.
3. 🔬 Mathematical Payload Efficiency: 1500 MTU vs 9014 MTU
To understand why Jumbo Frames improve local file transfer speeds, consider TCP/IP packet header overhead:
- Standard 1500 MTU: 1460 Bytes payload + 54 Bytes headers = 96.4% transmission efficiency. Transferring 100GB requires 68.4 million individual packets and interrupts.
- 9014 MTU Jumbo Frames: 8960 Bytes payload + 54 Bytes headers = 99.4% transmission efficiency. Transferring 100GB requires only 11.1 million packets (an 83% reduction in packet processing overhead).
4. 🛠️ Command Line MTU Ping Verification Test
Run this command in Windows Terminal (PowerShell / Command Prompt) to verify that your local network path is successfully transmitting unfragmented 9K Jumbo Frames:
ping 192.168.1.100 -f -l 8972
If you receive 4 replies with 0% packet loss, your 9K Jumbo Frame network is 100% active and optimized!
5. 🔬 Impact of Jumbo Frames on Switch Buffer Memory
When deploying 9K Jumbo Frames, ensure your unmanaged or managed network switch supports a Switch Packet Buffer of at least 1.5MB to 2.0MB (such as the TP-Link TL-SG105-M2 or Netgear GS308). Larger packet buffers prevent switch frame drops when multiple 2.5G devices transmit simultaneously.
6. 📝 Summary: The Simplest Local Network Speed Boost
Enabling 9014 Byte Jumbo Frames takes 60 seconds, costs zero dollars, and instantly accelerates your local NAS file backups and video rendering workflows.
7. 🔬 TCP Window Scaling & Selective Acknowledgment (SACK)
When pairing 9014 Byte Jumbo Frames with TCP Window Scaling (RFC 7323) and Selective Acknowledgment (SACK), Windows 11 can expand its TCP receive window to several megabytes. This allows local file transfers across 2.5G and 10G networks to saturate maximum theoretical line rates within milliseconds of initiating the file copy.
8. 💡 Summary of Optimization Benefits
- 600% larger packet payloads for local file transfers.
- Up to 80% reduction in CPU interrupt processing overhead.
- Instant acceleration for Synology, QNAP, and TrueNAS local backups.
9. 🔬 Diagnosing MTU Mismatches & Black Hole Routers
If enabling Jumbo Frames causes certain websites to fail to load, ensure your router’s WAN MTU remains at standard 1500 while local LAN interfaces utilize 9014. Modern managed switches automatically handle MTU translation between local 9K frames and standard 1.5K internet traffic.
10. 💡 Summary of Jumbo Frame Best Practices
- Enable 9014 Byte Jumbo Packet in Windows Device Manager.
- Enable 9K MTU on your local NAS storage appliance.
- Enjoy instantaneous local backups and maximum multi-gigabit throughput.
11. 🔬 Troubleshooting Jumbo Frame Packet Fragmentation
If you experience slow file transfer speeds after enabling Jumbo Frames, verify that your network switch and destination NAS storage also have 9014 / 9K MTU enabled in their respective management interfaces to ensure seamless end-to-end frame delivery.
12. 💡 Complete Optimization Summary
Enabling 9014 Byte Jumbo Frames provides an immediate, zero-cost performance boost for local file transfers, backups, and media streaming across your 2.5G and 10G home network.
13. 🔬 Measuring Speed Gains with Windows Resource Monitor
After enabling 9K Jumbo Frames, open Windows Resource Monitor (resmon) during a heavy NAS file transfer. You will observe a dramatic drop in CPU interrupt percentage alongside a sustained 280 MB/s transfer speed on 2.5G or 1.15 GB/s on 10G networks.
14. 💡 Final Jumbo Frame Checklist
- Set MTU to 9014 in Windows Device Manager.
- Enable 9K Jumbo Frames on your network switch and NAS.
- Enjoy blisteringly fast local file transfers across all your devices.
15. 🔬 TCP Throughput Gains Across Multi-Gigabit Networks
By increasing packet payload sizes from 1500 to 9014 bytes, local network transfers experience a noticeable reduction in TCP segmentation overhead, allowing large file transfers to reach their full theoretical bandwidth within seconds.
16. 💡 Complete Jumbo Frame Best Practices
Verify that your PC, switch, and NAS storage all share the same 9K MTU setting to ensure seamless, lightning-fast local network performance with zero packet fragmentation.
17. 💡 Verifying Maximum MTU Size via PowerShell
To confirm that your network interface is actively running 9014 MTU, open PowerShell as Administrator and run Get-NetAdapter | Select-Object Name, NdisVersion, InterfaceDescription to inspect the active MTU status across all adapters.
18. 💡 Final Troubleshooting Tip
If jumbo frames cause unexpected disconnects on older consumer routers, simply reset the MTU setting back to 1500 to restore standard packet delivery.