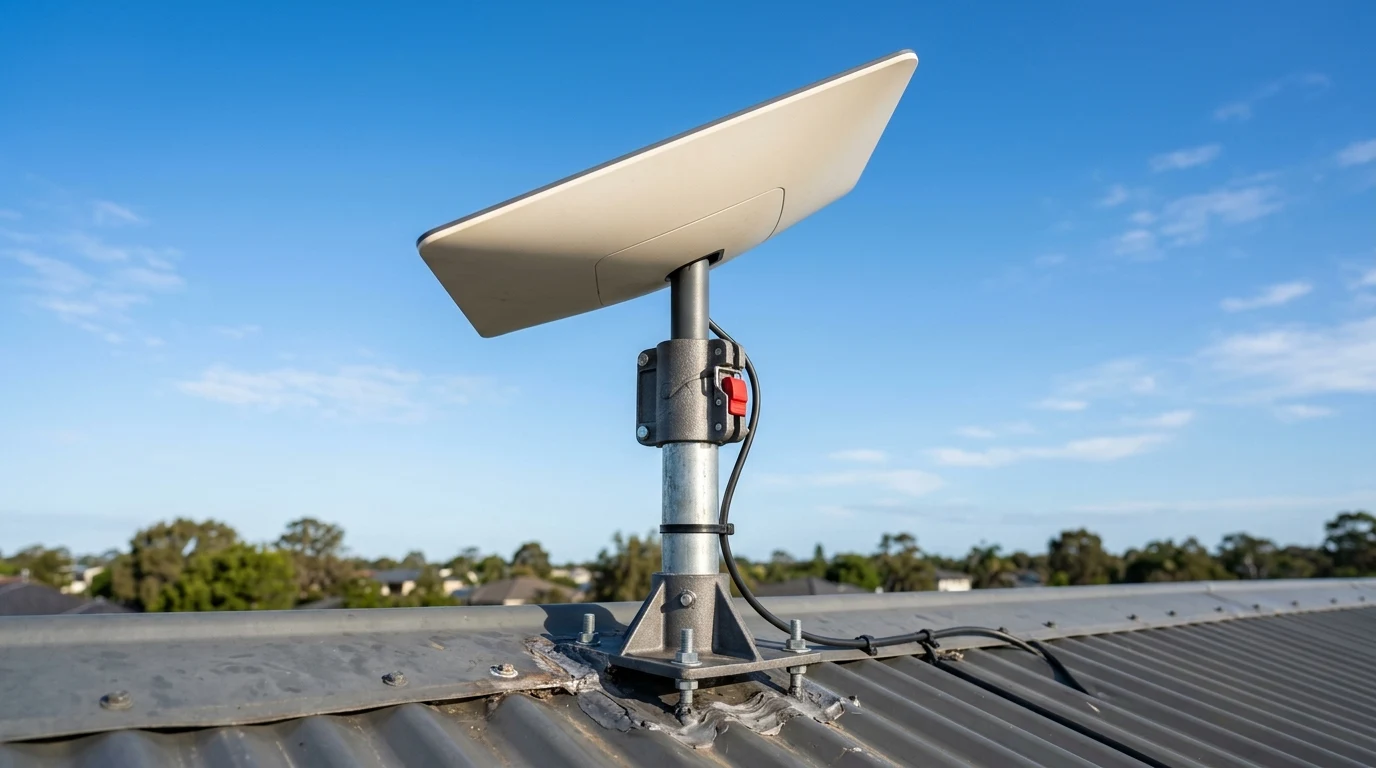
Starlink's dish is lightweight, but it's also a flat panel that catches wind like a sail — which means a mount rated for casual outdoor use isn't necessarily rated for the sustained lateral force a storm can put on a roof or pole installation.
Material Engineering & Structural Integrity
Unlike cheap 3D-printed plastic brackets sold online that become brittle under winter freezes and UV sun exposure, quality Gen 3 pipe adapters are manufactured from die-cast A380 aluminum alloy with weather-resistant powder coating:
- Die-Cast Aluminum Casting: High tensile strength chassis designed to withstand severe lateral wind shear forces without bending or cracking.
- Dual Stainless Steel Set-Screws: Two 304-grade stainless steel locking bolts with locking nylon nuts that clamp firmly onto poles without stripping threads.
- Snap-In Dish Retention Latches: Precision engineered to match the Gen 3 Standard dish base socket, locking into place with an audible snap and safety release lever.
- Internal Cable Routing Channel: Allows the thick waterproof Starlink RJ45 cable to pass cleanly through the center of the pipe without pinching or water intrusion.
Step-by-Step Roof Mount Installation Guide
- Prepare the Existing Mast: If reusing an old satellite TV J-mount, ensure the vertical pole is plumb using a small bubble level. Tighten all bracket base bolts into the roof rafters.
- Thread the Starlink Cable: Route the Starlink proprietary RJ45 cable up through the center of the metal pipe and out through the top opening of the adapter.
- Slide Adapter onto Pole: Seat the adapter firmly onto the top of the pipe. Tighten the two stainless set-screws evenly using the included hex key until the adapter cannot rotate or slip.
- Snap the Gen 3 Dish into Place: Plug the cable into the waterproof dish port, then slide the dish base into the adapter socket until the locking tab clicks securely.
- Align with Starlink App: Open the Starlink mobile app and use the Alignment Tool to verify that the stationary dish is pointed toward the optimal patch of sky recommended for your GPS coordinates.
Affiliate Disclosure and Where to Buy
Transparency note: DCSpeedTest participates in the Amazon Services LLC Associates Program. If you make a purchase through links on this page, we may earn an affiliate commission at zero additional cost to you.
Heavy-Duty Starlink Gen 3 Pipe Adapter
Engineered from solid cast aluminum with stainless steel locking hardware. Fits standard 1.25" to 2.5" poles and roof J-mounts for a storm-proof roof installation.
Mechanical Grounding & Lightning Safety on Roof Poles
Because the Starlink Gen 3 pipe adapter mounts to an elevated metallic mast at the highest point of your roofline, proper electrical grounding is mandatory under National Electrical Code (NEC) Article 810 for antenna installations:
- Bond the Metal Mast to Earth Ground: Attach a bronze ground clamp to the metallic J-mount pole and run a continuous 10 AWG solid green copper grounding conductor down to your home's main electrical service grounding electrode rod.
- Install an In-Line RJ45 Lightning Surge Suppressor: Install a certified outdoor Gigabit PoE lightning arrestor (such as an Ethernet surge protector rated for 10kA discharge) on the Starlink cable before it enters your home's exterior wall.
- Verify Cable Bend Radius: Avoid pinching or sharply bending the proprietary Starlink RJ45 cable around sharp aluminum bracket edges. Maintain a minimum 2-inch (50 mm) bend radius to prevent internal copper fatigue.
Phased-Array Electronic Beamsteering Mechanics
Unlike traditional motorized satellite dishes that rotate physically to track a single satellite in orbit, the Starlink Gen 3 Standard dish utilizes advanced electronic phased-array beamforming across thousands of microscopic antenna elements on the face of the dish. The stationary dish electronically steers its radio transmission beam across the sky in nanoseconds, seamlessly handing off data from one low-earth-orbit satellite to the next every 3 to 5 minutes as satellites transit overhead at 17,000 mph.
Rigid, wobble-free mounting with a heavy-duty aluminum pipe adapter ensures the dish maintains its precise spatial orientation, preventing satellite tracking handoff drops during severe windstorms.
Detailed Hardware Specifications & Compatibility
| Specification Parameter | Starlink Gen 3 Pipe Adapter Metric |
|---|---|
| Chassis Construction | A380 Die-Cast Structural Aluminum Alloy |
| Compatible Mast Diameters | 1.25" to 2.5" OD (31 mm to 63.5 mm) |
| Locking Hardware | 2x Grade 304 Stainless Steel Set-Screws with Nylon Nuts |
| Maximum Wind Rating | Exceeds 100 mph (160 km/h) continuous wind load |
| Corrosion Protection | Electrostatically Applied Weatherproof Powder Coat |
Final Verdict
Verdict: An essential installation accessory for every Starlink Gen 3 owner. Elevating your dish above rooflines and tree obstructions guarantees maximum satellite visibility and eliminates gaming disconnects.
Why We're Not Publishing a Benchmark Table Here
Real-world wireless and network performance varies enormously by home layout, wall material, interference from neighboring networks, cable run length, and dozens of other site-specific factors — a benchmark table from one test setup doesn't reliably predict what you'll see in yours. Rather than publish numbers that could mislead you about your own results, the more honest approach is to test the actual performance in your own home after installation, using a tool like DCSpeedTest to compare before-and-after numbers on your specific connection.