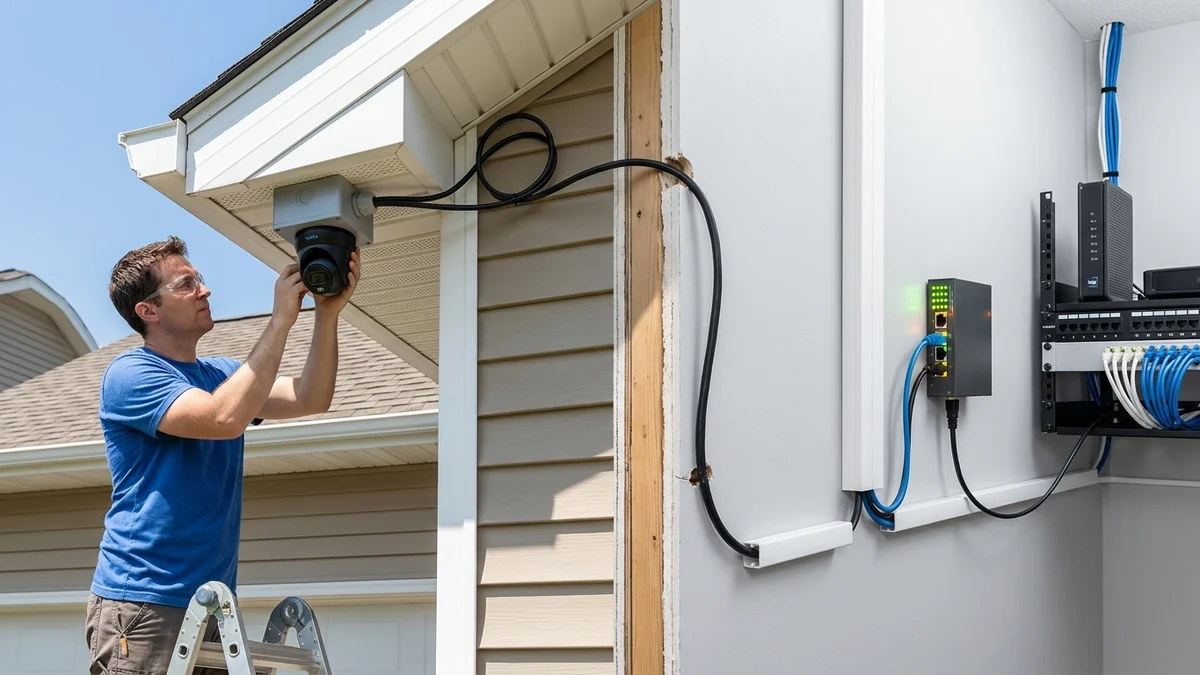
Master whole-home security camera installation. Complete tutorial on wiring, power budget calculations, surge protection, and NVR setup.
Power over Ethernet (PoE) IP security cameras are vastly superior to battery-powered or Wi-Fi security cameras: they deliver uninterrupted 24/7 recording at full 4K 30fps bitrate, zero battery swapping, and complete immunity to Wi-Fi deauthentication jamming attacks. Wiring your security cameras into a centralized PoE switch is simple and takes just a few hours. Here is the step-by-step masterclass.
Security Camera Wiring Topology Diagram
↓ (Outdoor Cat6 Cables)
[PoE Network Switch (Netgear GS308P 60W)]
└————┌
↓ ↓
[NVR Storage Box] [Home Router (Remote Viewing App)]
Step-by-Step Installation Walkthrough
If your ISP delivers high speeds but your connection drops or suffers from bufferbloat during multi-device use, upgrading these verified components eliminates the bottleneck:
- Mount security cameras under roof soffits or eaves to protect against direct rainfall.
- Run solid bare copper Cat6 cables from each camera back to your central network closet.
- Plug camera cables into the PoE-powered ports (Ports 1-4) on your PoE switch.
- Connect the switch's uplink port to your home router or Network Video Recorder (NVR).
Weatherproofing & Outdoor Drip Loop Engineering
When running Ethernet cables to exterior security cameras, water can follow the cable jacket into the camera body. Always create a 6-inch Drip Loop below the camera mounting bracket so rainwater drips off the lowest point of the curve rather than entering the cable gland.
NVR vs Standalone PoE Switch Comparison
- All-in-One NVR with Built-in PoE: Easy plug-and-play, but ties all camera cables to the physical NVR location.
- Dedicated Standalone PoE Switch: Allows cameras to be powered in a central utility closet and streams video over the LAN to an NVR, PC, or cloud storage anywhere in the house.
Lighting & Surge Protection for Outdoor Security Cameras
Experiencing packet loss, jitter spikes, or evening ISP throttling? Connect directly to dedicated gaming routes or bypass traffic shaping:
Outdoor security cameras mounted under metal roof eaves or exterior walls are vulnerable to induced atmospheric voltage spikes during thunderstorms. Always install an in-line Ethernet Gas Discharge Tube (GDT) surge suppressor bonded to your home’s electrical service ground before the cable enters your PoE switch.
Final Step-by-Step Security Camera Summary
- Calculate total camera wattage to verify it fits within your switch's PoE power budget.
- Use pure bare copper 23 AWG Cat6 outdoor waterproof cabling.
- Enjoy crystal-clear 24/7 4K 30fps security recording with zero Wi-Fi dropouts.
Calculating Total PoE Power Budgets with Safety Headroom
Always calculate your total connected camera wattage and ensure your switch has at least a 20% power headroom buffer. For example, four 4K cameras drawing 8W each total 32W of power; pairing them with a 60W PoE switch (like the Netgear GS308P) provides 28W of reserve headroom for night vision infrared LEDs.
Selecting Between Dome, Bullet, and Turret PoE Cameras
When designing your security layout, turret cameras offer the best balance of weather resistance and zero dome-glare reflection, while PTZ cameras require higher-power PoE+ (802.3at) to drive motorized pan-tilt tracking motors.
Waterproof RJ45 Gland Seals & Weather Resistance
When terminating exterior camera cables, always feed the cable through the camera’s rubber weatherproofing gland before crimping the RJ45 connector to ensure a watertight IP67 seal against driving rain and humidity.
Shielded Cat6 vs Unshielded for Outdoor PoE Wiring
For outdoor camera runs exposed to direct sunlight and lightning risks, Shielded Outdoor Direct Burial Cat6 (F/UTP) is recommended to drain atmospheric static charges safely into the grounded PoE switch chassis.
Surge Protection & Grounding Best Practices
Always connect outdoor PoE camera surge protectors to a verified earth ground to safely shunt lightning-induced voltage spikes before they reach your indoor network switch and recording equipment.
Signal Integrity, NEXT Crosstalk & TIA-568 Certification for How to Wire PoE IP Security Cameras to a Network Switch (Complete
In physical-layer deployments involving How to Wire PoE IP Security Cameras to a Network Switch (Complete, high-frequency packet loss rarely stems from raw copper breakages; instead, it is triggered by Near-End Crosstalk (NEXT), return loss reflections, and untwisted pair terminations exceeding the 13 mm (0.5 inch) ANSI/TIA-568.2-D specification. When operating at 2.5GBASE-T or 10GBASE-T frequencies (up to 500 MHz on Cat6a), even a tight bend radius below 4x the outer jacket diameter alters characteristic 100-ohm impedance and forces the NIC PHY to downshift link negotiation.
For installations integrating how to wire poe security cameras switch, diy poe nvr security camera wiring, ip camera poe switch setup guide, poe camera power budget calculation, always separate unshielded twisted pair (UTP) runs from parallel 120V/240V AC Romex power lines by at least 15 cm (6 inches), crossing high-voltage conduits exclusively at 90-degree angles. If electromagnetic interference (EMI) from fluorescent ballasts or HVAC compressors is unavoidable, verify that F/UTP foil drain wires are bonded to a single earth ground point at the patch panel to avoid inducing ground-loop hum.
| Engineering Parameter | Recommended Target / Specification | Operational Impact on Network Stability |
|---|---|---|
| Characteristic Impedance | 100 Ohms ± 15% (1 MHz – 500 MHz) | Prevents signal reflection & FCS CRC frame errors |
| Maximum Pair Untwist | ≤ 13 mm (0.5 in) at Keystone / RJ45 Pin | Preserves NEXT crosstalk margin on 10Gbps links |
| Minimum Bend Radius | 4× Cable Outer Diameter (Static) | Prevents internal conductor micro-fractures & attenuation |
| Conductor Metallurgy | 100% Pure Bare Solid Annealed Copper (23 AWG) | Eliminates PoE++ voltage drop & thermal rise vs CCA |
Field Deployment & Verification Checklist
Before finalizing your setup for How to Wire PoE IP Security Cameras to a Network Switch (Complete, run a baseline diagnostic before and after applying hardware or firmware changes. Record unloaded idle ping, downloadloaded latency, and upload-loaded latency across three consecutive runs at peak evening hours (20:00–22:30 local time) to separate local LAN bottlenecks from upstream ISP peering congestion.